Friday, 13 September 2013

42211

Hi Guy's,

I have been doing a bit of work on enhancing the Auscision 422 class. They are a good model as is but I just wanted to make the model my own. There is a few modifications that I have done which I think has really set the model off. There is one big issue with the model that I thought to address as well.


Here I have shots of the finished model and it straight out of the box. As you can see the model straight out of the box isn't too bad. As I do with any new model that I receive, I get out any photo's and reference material that I have and study the model to see what can be done to improve it. Usually a good weathering is all that is needed for an Auscision Model. Well after studying some photo's there was something that bugged me regarding this model. When I looked at the main Air Tanks on the side of the chassis something just didn't look right. The body sits over the top halve of the tank and looking at photo's this clearly doesn't happen.

I come to the conclusion that the Body simply sits to low on the Chassis. So I set about looking at ways to raise the body about 0.8mm. It was a bit a challenge but I think the results have made for a much better looking model.
 
First step was to look at what keeps the body attached to the frame. There is two clips on each side of the body, so on the chassis I used my Dremel with a cutting disk to remove about 1mm from the bottom of the lugs.


As I was raising the body I also had to raise the pilots as well. Pictures do tell the story. I had to remove about 1mm from the top of the bracings behind the pilot. I also had the file and lower the coupler pocket to keep the couplers at the same height.
 
I had to add .030 or 0.75mm styrene to the top of the mounts for the Pilots. I think the strip I used here was Number 137 or .030x156". I pre-drilled the holes and used longer pieces for handling.
 
Once glued down I used a razor blade to cut the extra's off. It is important to only just cover the screw plates as if any larger it would get in the way of the lighting circuit for the marker lights that sits in behind the pilot. With the pilot in place and raised it inturn raises the lighting circuit to the correct height to match the body. Because the lighting will no longer sit down tight in its home I had to use a couple of spots of super glue to hold it in place. only enough so I maybe able to break it free if need be.
 
That pretty much covers what I had to do to raise the body. The only other thing that was necessary was to add a bit to the tops of the lifting points as there was now a gap there. I forgot to photograph this step but all I used was the same .030 styrene and glued a longer piece in such as the pilots then cut and filed it down till I was happy with the result.
 
A couple of other improvements
 
I bent up some parts of staples to pin down the sand hoses on the fuel tank side of the bogies. They are a problem bending and not sitting well with the model so this was my solution. I tried to also pin the ones on the pilot side on the bogies but found that it prohibited the movement of the bogie too much. When I weather future models I will remove the weathering from these sand lines as it will only full off anyway as they flex. It will be interesting to see how long they stand up to running and flexing all the time. If they break, I may look at using fine electrical wire or Brass Wire as a replacement. Even though they are a pain to have, when sitting right they do look good on the model.


Other improvements were painting the control stands green. As 42211 was originally an unpowered pre-production model from Auscision, I removed the crew, folded back the Mirrors and added blinds to the windscreens that I had pulled mostly down. 
 
I also painted the front hand rails white, painted the couplers and lifting points yellow and gave the model a light weathering. I found that most 422's around 1992/93 were pretty well kept. As they were regulars on the Southern Highlands Passenger Trains they made it through the Car Washes at ACDEP quite a bit. So it was rare to see one that was really grubby. As my era go between 1990/96, this loco will make a fine addition to running the early days of National Rail when they were leasing 82/80/422 class loco's before the NR's arrived on the scene.


A couple of more shots
 
Just to finish off, I found this shot in my collection of 42211 in action. I think this is a Jamie Fisher Photograph but I am not sure.
 
It is a bit of work to raise the body on these 422's but I think it is well worth the trouble.
 
Cheers Justin Moy


Tuesday, 10 September 2013

Data Packs

Hi Guy's,

I would just like to share with you something that I have been doing for a while now which can be a great help, when it comes to modelling. When I was living up at Ballina just over 10 years ago, I became involved with the Northern Rivers Fussy Modellers Group. This was a bunch of really good modellers that lived around the Northern Rivers Area. It wasn't a club as such, the guys would usually get together on a Friday night at each others place and model and consume Alcohol. The guy's would travel to exhibitions together and plan field trips, say to say Dorrigo to measure up some wagons and take photo's.


One thing that they taught me was the value of making up Data Packs. Now I guess a Data Pack can be what ever you want it to be. In their case they had made up packs for pacific wagons that they wanted to model. The general idea was to get as much info possible about that phototype. It would start with what Information can be gathered. This is usually an Article from the AMRM or can be the instructions from an available model kit. Any drawings of the wagon are added and then a series of photographs of the wagon including detail shots. I use the Plastic Portfolio's that you can buy from any newsagent to make up mine and photocopy any info that I need and glue in photographs as required. I was very lucky that the guys let me copy much of the stuff that they had. This is probably the reason that I model NSW now and not US prototype as I was at the time.

This is from my pack on the ELX group of wagons. The left side I think is a copy from the AMRM and the right is a plan drawing. Not sure where I got that from but it is handy.
 
This is another page from the same pack. Some photographs and more from the AMRM
 
This is from my VLX pack. These are BGB instruction sheets
 
As I get further into the pack, I try to add as much portrait shots of the wagons as I can. I find this most useful when it comes to painting and weathering. Some of my data packs only consist of photo's as this is all I have needed or could find when I was making it up.
This is from my NLDF pack. These are actually some of my photographs taken at Manildra.
 
After all the portrait shots I would then add as many detail shots that I can find. This is the detail shots from my NGGF file. I hoped to one day to super detail a number of Silvermaz NGGF's but Auscision Models beat me to it. This file will now only be used for the weathering of these wagons.
 
This is the start of my first Locomotive Date Pack. I now have an OTM's 82 class that I want to weather and add more detail to make it my own. It was about 10 years ago that made up most of my data packs. Back then I had to rely on whatever publications that I had and any photo's that I could get. Today with the internet, what a great tool this can be. With all the social groups that you can join on say Face Book for example, sometimes all you have to do is ask a question and you can get all the information that you need. I asked about 82 detail shots and 24 hours later a number of the members had private emailed me a number of detail shots. How good is that.
 
Anyway a data pack can be anything that you want it to be. I like a hard copy as they say so I can sit it beside me while modelling. I could just have it sitting in the computer as well. They come in very handy to me as the information is all there in one place. Anyway I hope this is of interest.
 
Next the shots of the 82 class model
 
Cheers Justin Moy


Monday, 26 August 2013

Unseen Detail

Hi Guy's

Just a quick post. Just thought to show some, what I think is unseen  detail of some of our RTR Locomotives. I got my 100mm Macro out to take some shots of a few details that is very hard to see with the eye. It is brilliant detail but my 40 year old eyes are finding it hard to see.
This is the intake grill on and Auscision N Class up close. I believe this is Brass Mesh. That has been used. Not bad but very hard to see this detail unless you get out a Magnifying Glass out.
The On Track Models 82 class uses a similar Brass Mesh Grill for their Intake. The Etch sitting beside the Loco is the Grill for the Dynamic Brake Intake. It covers a white panel to simulate the white panels inside this area.
The Detail of the Main Engine Radiator on the Auscision N Class. This is pretty good engineering on part of the Di Makers.
The detail inside the Dynamic Brake Grids on the Auscision N Class
The Main Radiator Detail of the Auscision 422 class.
 
It is all brilliant detail that I think many just don't realise is there. I am sure there is plenty of other fine detail out there on other models that I haven't noticed as yet. It just maybe worth getting out a Magnifying Glass out and having a look.
 
Cheers Justin Moy


Wednesday, 14 August 2013

A bit happening

Hi Guy's

Well I have been busy over the Couple of months. As I mentioned I returned to work after 7 months of Paternity Leave. Well 2 months ago I left work after my mother in law decided that she no longer wanted to look after the children before school and during the day for Hannah. With Child Care being unaffordable for us, I had to bite the bullet and leave work. I have mixed feeling about this but in the end there was not much that I could do about this. I now have a bit of time so things are getting done. My Train Room is now complete and I have moved into it. We now have a 4 bedroom house so Hannah now has her own room.

One the modelling front, I have now had about 2 weeks of good modelling time and starting to get a few projects happening. I have had a bit of stuff of Auscision's to do and the photography that goes with it.
This is probably one of my favourite shots of a serious that I took for Auscision
 
I don't mind this colour scheme when it is weathered up. The N sets many for a nice model
 
Auscision let me have a play with one of their pre-production models of their up coming AN Loco.
I must say it is a nice model and I think everyone will be pleased with them. I only lightly weathered this one to show up a bit more detail.
 
A closer look at the model
 
 
Some weathered Auscision N class loco's
 
 
Just added a bit more weathering to a couple of Auscision ABFX models
 
Anyway not a lot of text with this latest blog. As I get some more time I will start to log my modelling work as I have in the past. This is just an update. Things that I will be looking at recording is work of a number of 80 and 44 class loco's. Loco's that I have on the blocks are 8030 in Cube Livery, 8040 in what ever livery it is in atm, 4446 in Tuscan 1992 era, 4488/91/97 in reverse 1992 era, 44201/44213/44214/44228/44232/44237 all as they were in 1992. I have plenty of wagon projects on the hop too. Anyway update as they come.
 
Cheers Justin Moy


Saturday, 8 June 2013

Not much to report

Hi Guy's,

I have been real busy of late with family life, so model work has been real slow. I have had to return to work which real sucks and working as a Labourer really does take it's toll on me. But in order to stay living here on the beautiful north coast I guess you have to take what you can get. The cost of living at the moment is just insane. We are battling a bit and my modelling is suffering due to that. Sometimes it is hard just to find the money just  to top up on paint and detailing parts to finish little jobs. ATM am trying to scratch enough money together this weekend to get to the Epping Show in Sydney but the frustrating part about this is that even if I get there, I won't be able to buy anything which really sucks! Enough of my gripes. Into some modelling.

One of my favourite weathering jobs which I did about 5 years ago was for my mate Greg Riddel. I have weathered up also his Trainorama 44 class loco's over the last 10 years or so but 4432 was my best effort. I borrowed it back off him the other day so I could take a couple of High Key photo's of it. When I originally weathered it I wasn't the best at High Key Photography so I thought to get some good shot of 4432 now.

Here is a shot of it in Action shot on Greg Riddels Beyond Bulliac Module as it sits in the loop on 6382 empty steel as 8002 passes on a down freighter.
 
 
A few other projects that I have been working on.
 
I added some detail and lightly weathered some Austrains QRN CLP's and X class loco's. One this CLP I added sanding boxes to the Bogies, I covered in the grills over the Hep Units and also the covered the original sanding hatches. On the X class units I added ditch lights, GPS and A/C details.


This is an Auscision N class that I have been modifying the paint on to the original Cheeseburger colour scheme.
 
 
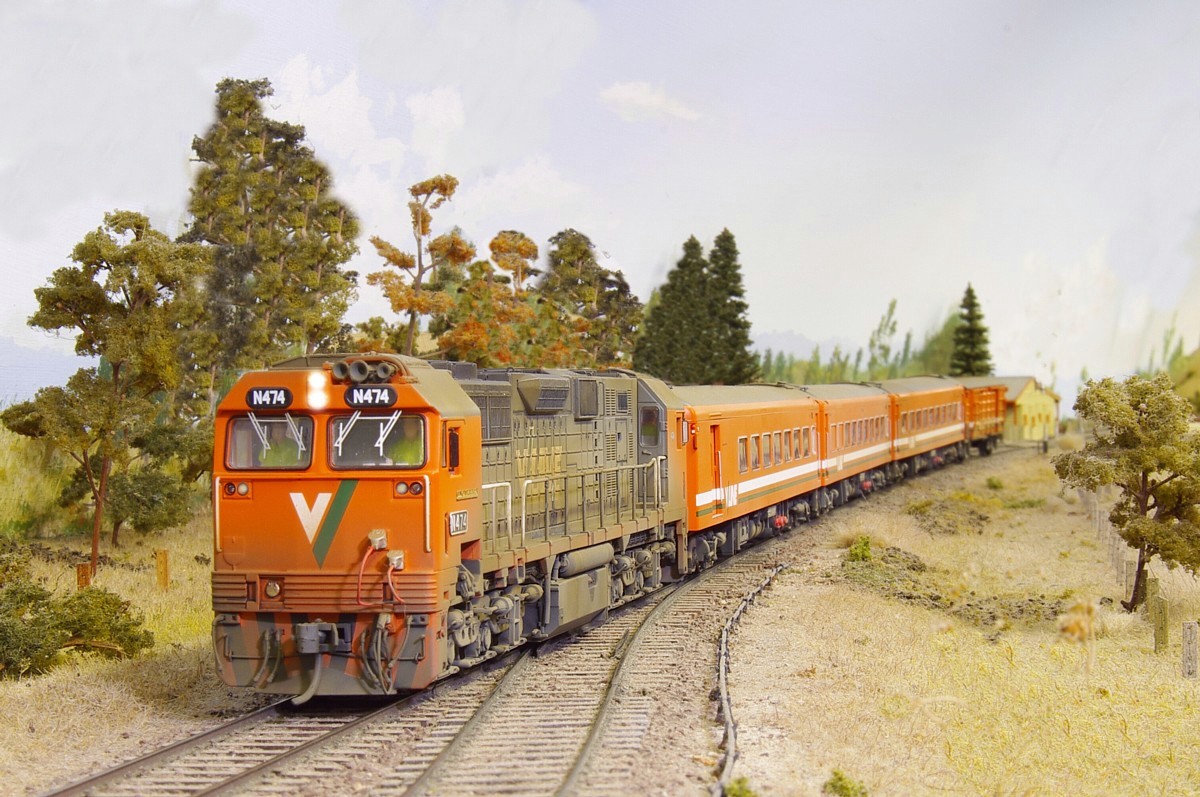
On the Subject of Auscision, they send me a pack of the new N cars to have a play with. I would say these are on the water so they should be available soon. Here is a couple of quick shots before I attack them with some weathering.


Anyway that is all I have to report atm.
 
Cheers Justin Moy