My Ultimate 81 class

Hi Guy's
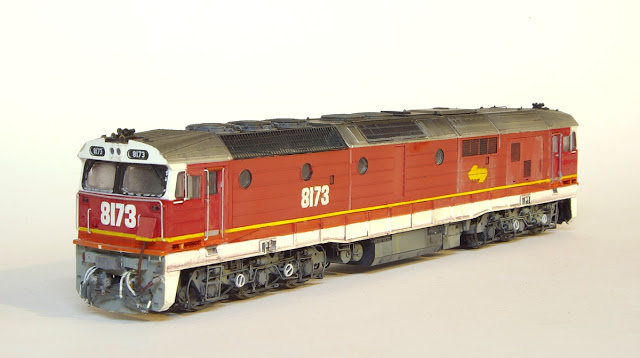
I have had this 81 class pretty finished for over a year now. I mainly wanted it running at last years NSWDEM running day. This was featured in a previous blog. There is a lot to talk about with this model. It has stemmed from a want to make a good representation of a 81 class at the time.
Over the years there has been quite a few models of the State Rail 81 class come out on the Market. I think first may of been the Classic Brass 81 class. Then around 1987 AR Kits come out with a plastic Kit as such and 1988 Powerline introduced there RTR plastic 81 class. I could not afford a Brass 81 at the time, which was what you would expect from Brass. The Mech. in the Powerline Model was a toy, The AR Mech. being K&M was basically brass but I didn't like the cabs on the Model. That said over the years I have repowered a number of Powerline Models and did up some AR Models. But I have never really like their presentation of an 81 class.

This is a Powerline 81 class sitting on an L&C Kits Chassis with an Austrain's C Class Mechanism. It has AR Kits side frames fitted. I did this model around 20 years ago.

This is an Example of an AR Kits 81 class.
Then came the Austrains 81 class
What a disappointment that was!!!!!!!
Modeler's waited quite some time for it.
Then when it arrived even Austrains stated that the Candy 81 model was just not good enough and offered refunds to prepaid orders and then offered the balance of models at the discounted rate if memory serves me correctly. I am pretty sure I purchased mine for $175.00 at the time. Anyway I looked at the positives, it had a nice running mechanism and some details were correct. It sat for a couple of years then I started taking a closer look at it.
I looked at all the bits n pieces that I had laying around. What could I do to this model to make improvements? Well there was a long list. I hope I don't bore you all with this.
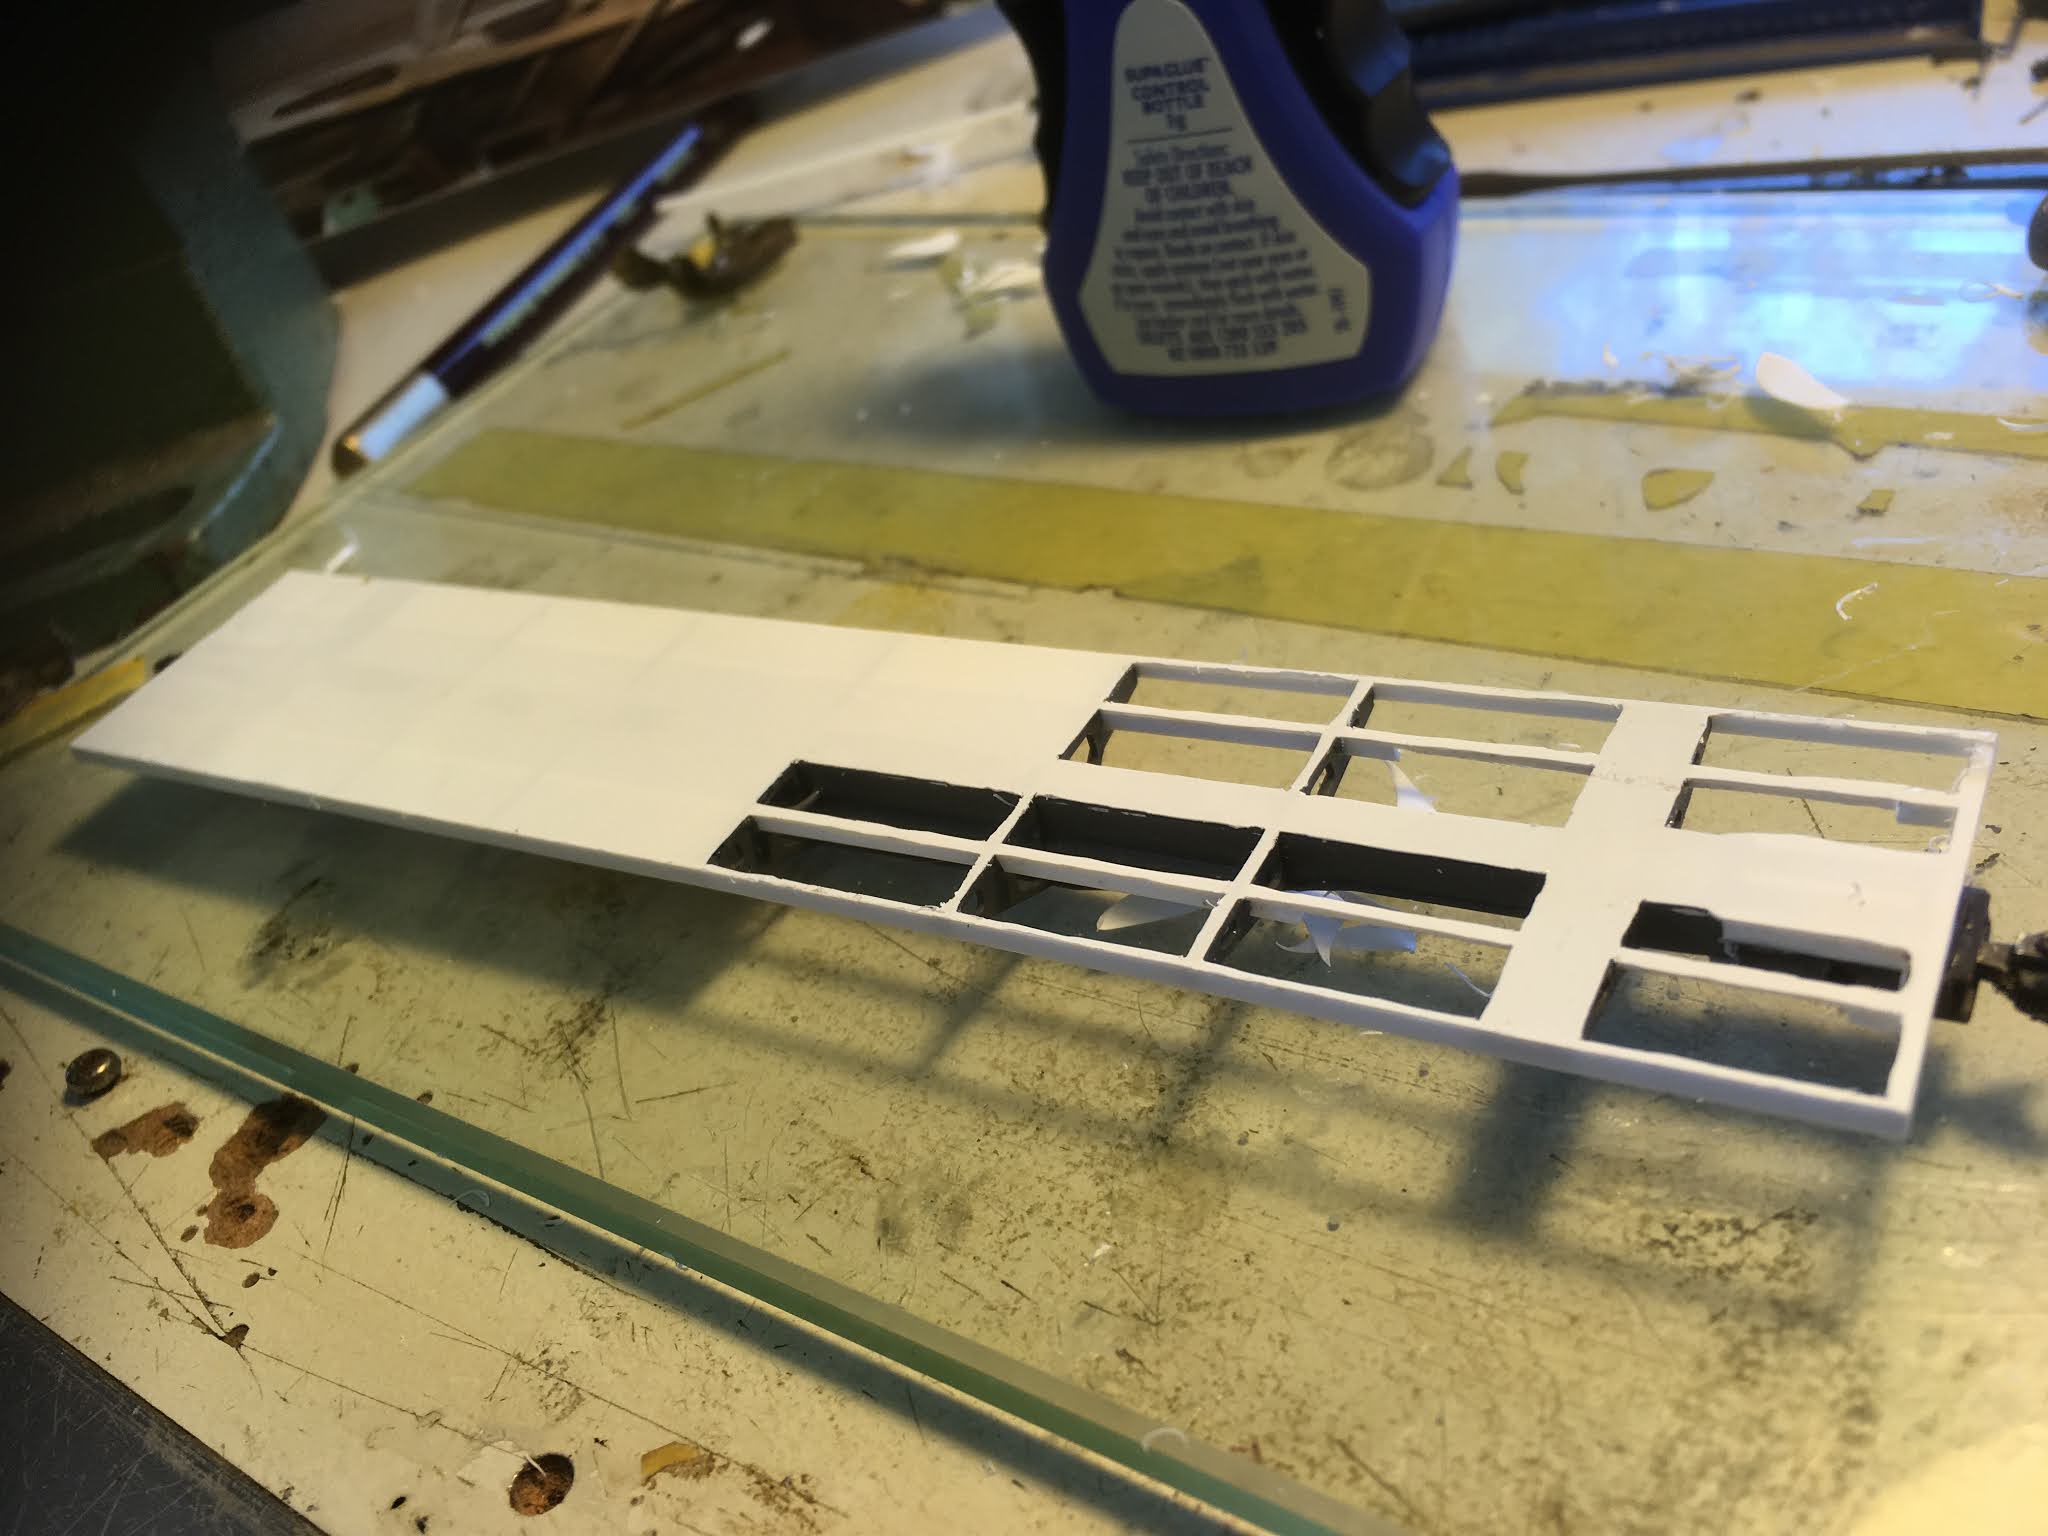
At first I looked at plenty of 81 class photo's to compare details. First issue tackled was filling in the extra door. When 81 classes all went for their 10 year CCO at Bathurst an extra engine room door was fitted. They were also repainted into the Freight Rail Blue Livery. Thus no Candy 81's had this door fitted. I happen to have some undecorated bodies that I acquired so I removed the necessary pieces to then replace this door with a port hole.

Another issue was the body height. Due to this the Candy strips were applied incorrectly. The Candy yellow strip run too low and along the chassis part and not at the bottom of the lift out sections. looking into what may of caused this, it become necessary to add 1mm of height to the body above the frame as such. This was achieved using 1 by 1.5 mm Styrene.
This was placed between the Chassis and body. This is places made up the area for the correct placement of the yellow line.

The Orange line will now be around the correct width also after this Modification.

Powerline foot hole and lifting point added. In the photo you can see the main air intake and the extra intake on the mansard each side of the exhaust. This was features after the 10 year CCO and incorrect on a Candy 81.

As they were before

I had to cut the main air intake out of an AR Kits body that I had to make it the early version intake so I decided to also use the chassis section from the AR model as well.

This is the result after I added the AR Kits frame and air intake. In this photo you can also see where I added the 1mm styrene to the body. I have also covered over the extra intake near the exhaust with thin styrene. I still used the original pilot. I had it sitting on an AR Kits provided K&M Mechanism at this point for posing purposes. The Air intake had also been replaced with a Brass Etch that I got with a G Class detailing kit. The original sat too low and just didn't look right. Another Modification was a lowing of the AC units. This was aided by having spares on hand.
Next step I cut out the main radiator section and rebuilt it. I lowered the fans by about a 1mm as they sat to high


Photo's didn't go on in order but you can see what I am about here. I also raised the height of the fuel tank by about 1mm as it sat too low and I moved the battery boxes in a bit too.

I also filled in the little cut outs at the bottom of the pilots that are there to aid chassis removal. Not done as yet in this photo.
Other Modifications include;
# added to the length of the head stocks above the couplers.
# added brass Air Horns
# changed the exhaust casting
# added white metal MU hoses and brass covers over the dummy MU points
# added AR kits Hand Brake wheels to the bogie side frames
# I added new number decals to the sides and new L7 logos. I had trouble with these failing and touch up with paint which doesn't look the best. I may readdress this later.
That is all I can think of for now
The only misgiving I have with this project is I really only did touch ups on the paint work as I went. I should of did more masking and Air Brush work. It shows esp. when I was editing photos for this Blog.
I have had a chance to see the progress of the SDS Models 81 project. All the issues that I have chose to address on this Austrains 81 have been address as far as I can tell on the SDS model so it will be worth the wait. Covid issues no doubt will have slowed it down but it will be worth the wait.
Some Photo's to end


Cheers Justin Moy