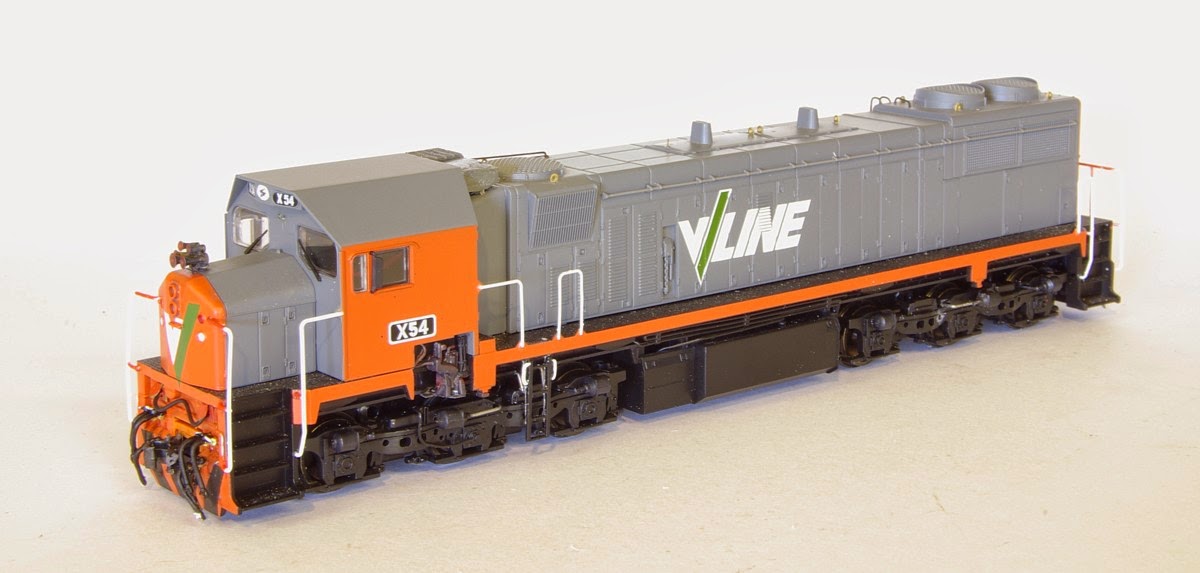
Got a few things to talk about, hope I don't bore anyone? I just finished working on an Austrain's X class for my mate Dave. I did a bit of work on it to make improvements. Probably the biggest one was replacing the side frames with that of a Trainorama S class. I mounted the side bogie steps to the frame of the loco, I used bent up staples to form a strong base to glue the steps on. I also formed a AC unit from styrene, added Brass Air Hoses and Air Horns from the Mains West Range and used an ILM's pilot in fill to add the KD Couplers. The aim was to present the loco as running in the Mid 90's. Dave says it will look great running with his 930's on a Jet.
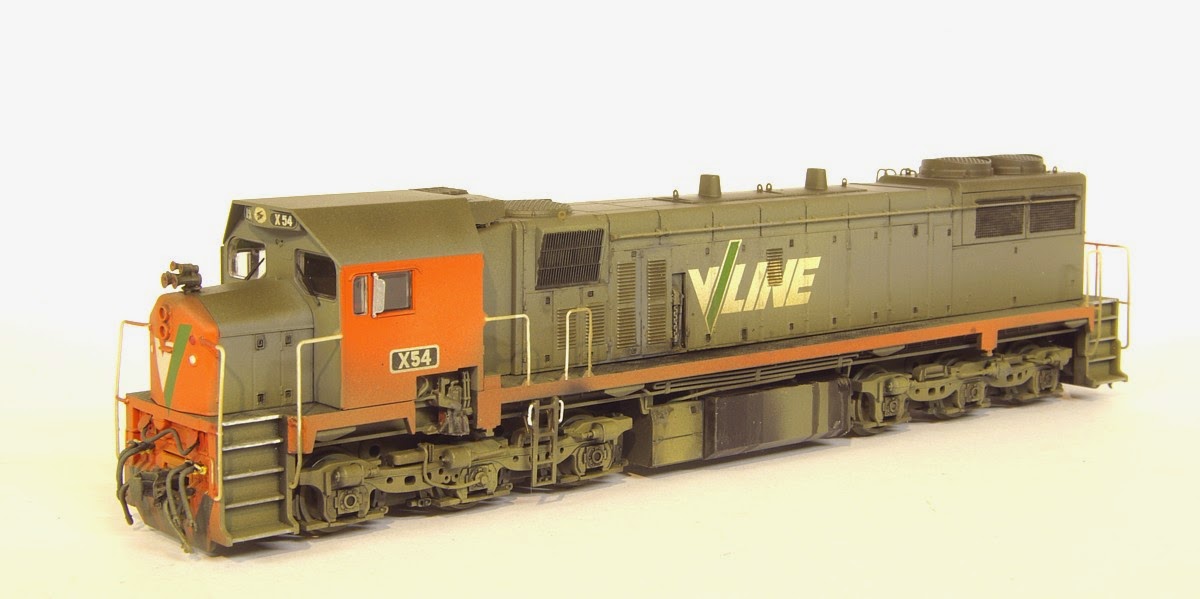
Here is a shot before I started the paint work
I also used some fine electrical wire for the Mu Hose.s
I don't know why I haven't mentioned this before on my Blog, but my Train Room is now complete, it maybe a while before I start building my layout that will incorporate Killawarra. But the room is available. I am working on a Diorama for photographic purpose which will be finished soon. This next series of photo's shows the room and the planning stage of the diorama.


The Diorama, is being built around a small diorama that I swapped some stuff for with Andy Burge from Victoria. It will be unfortunate that the rest will not be done with a nice hand laid point and track work that I have on this diorama.
What else do I have to talk about, I have a couple of Casula RTR NCPF Hoppers. They are quite nice and well detailed. All I have done to mine as yet is replace the bogies. The only reason for this is to make them standard with the rest of my fleet. The only thing that I am disappointed with these hoppers is the lack of weld lines on the body. I feel that to make the weathering look right, the weld lines need to be there. I will get around the fixing this soon I hope.
This series is out of the box


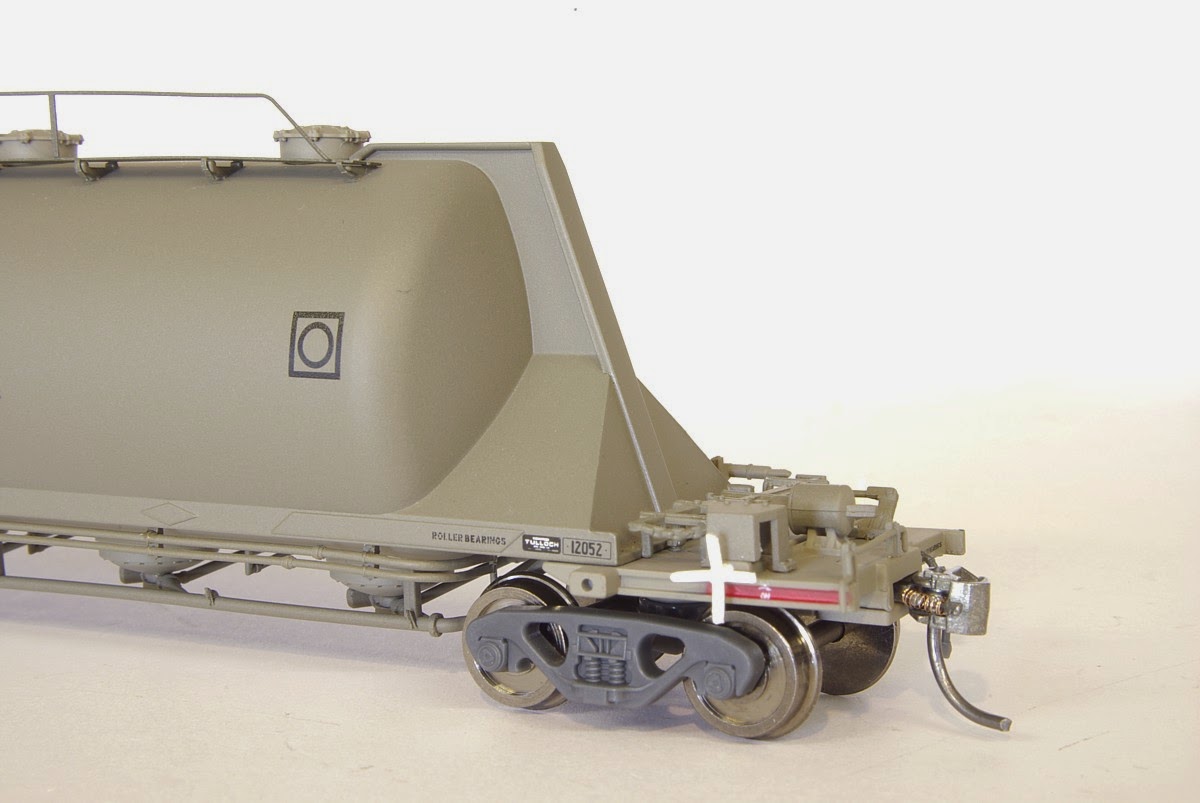


This is after I replaced the Bogies, I have placed the appropriate bogies these the individual wagons based on photo's I have of them in service.


These prototype shots were taken by Steve McElroy


On one of the wagons I will also modify the top hand rails as they been changed at some point in the wagons life. They will be a good weathering project when I get to them.
Here is another little project. With all the new updated 40 foot Victoria Vans coming out by On Track Models and soon Auscision Models, I was left with an Trainorama ALGX that just doesn't cut it when compared. Now the Prototype ALGX carries many similar build character traits as the Victorian Van. The Roof Profile is the same and the second series of vans has the same under floor as the second series of VLCX vans. Therefore the based this ALGX on the second series of Van. The first series of ALGX Van has a timber floor like the first series of VLCX but the brake gear is ass about with the hand brake lever on the other end. The 3rd series of ALGX has the welded floor but the brake detail is in a different location with a Brake Wheel instead of a Ratchet.
Anyway enough about the prototype, The model has involved replacing the roof with a spare OTM's VLEX roof that I had. Originally I was building a VLCX to match in with me OTM's VLEX's. I gave up on them after the model was announced by OTM and Auscision. I want this model to look like it could be out an OTM's box or Auscision Box. I have replaced the floor with Styrene but used the left over parts from the VLEX such as the Bolster and coupler pockets. I also used the brake gear. I have added any little details that I could find missing from prototype photo's to make it look more accurate.


This is as it stands atm. Soon to head into the paint shop
I received this PHA power van from Casula Hobbies recently. It is an Hawksmoor Casting. Still plenty of work to do to it.

I have been working on a few Candy Jumbo's. To show you some of the trouble I can go to. Not having matching Font decals for the Job, I get 44201 from 44216 took some masking and fine air brush work to get a result. I use a fine razer blade to clean up. Anyway Photo's tell the story.


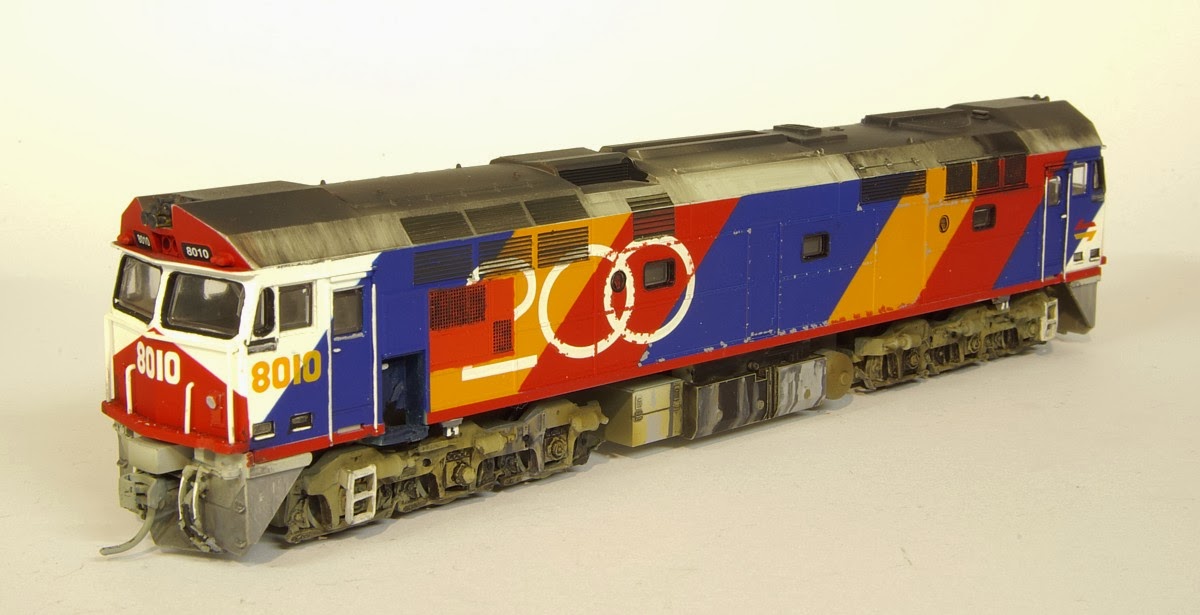
Lastly I have completed another 8013. Here is the shots


and this is an 8040 that I am working on

Happy Modelling
Cheers Justin Moy