
Auscision 8010

A little while ago I got my hands on this Auscision 8010. I am pretty Familiar with 80 class loco's. I have worked on a number of Austrain's 80's over the years even going to the trouble of Super detailing one. If you look back a way on my Blog I did one about this, I think it was called "Making 8002". So anyway when I got my hands on this model, I was very keen to go over it in detail to see just how good it was. Things have come a long way since the Austrain's 80 come onto the market. Back then I think I paid $150 for my first 80. At $335 off the shelf for this or $295 pre-ordered you would expect there would be major improvements. It is done well and at the end of the day you are getting what you paid for with this model.
I always look at ways I can improve a model. In order to do this I first look for any mistakes that I can fix. I have no problems letting fellow modelers know of any things that could be corrected and if I can offer ways that this can be done. The wiring side I am not interested in so I really don't want to comment there. My model is DC and runs fine. I have seen and heard the DCC sound option running and it sounds great. Detail wise is my interest.

Detail wise the model is great, If I could of done as good a job super detailing an Austrain's 80 it would be a sight to behold. The detail is all there. The only issue is keeping it on there. It is a fine detailed model and at the end of the day needs to be treated that way, but I'm F#@&ed if I know where one of my bogie steps went? That is one little detail to talk about first. It appears that the bogie steps are mounted outward a bit too far. The side frames may be related to the 442 ones. As the 442 model come first, the steps on the 80 model are in the same position as the jumbo. In reality the 80 has a larger cab and the steps are mount further back on an 80 due to this.

you can see in this photo the step doesn't line up with the cab door and should be mounted a little closer to the brake cylinder.

You can see in this photo where the step is mounted
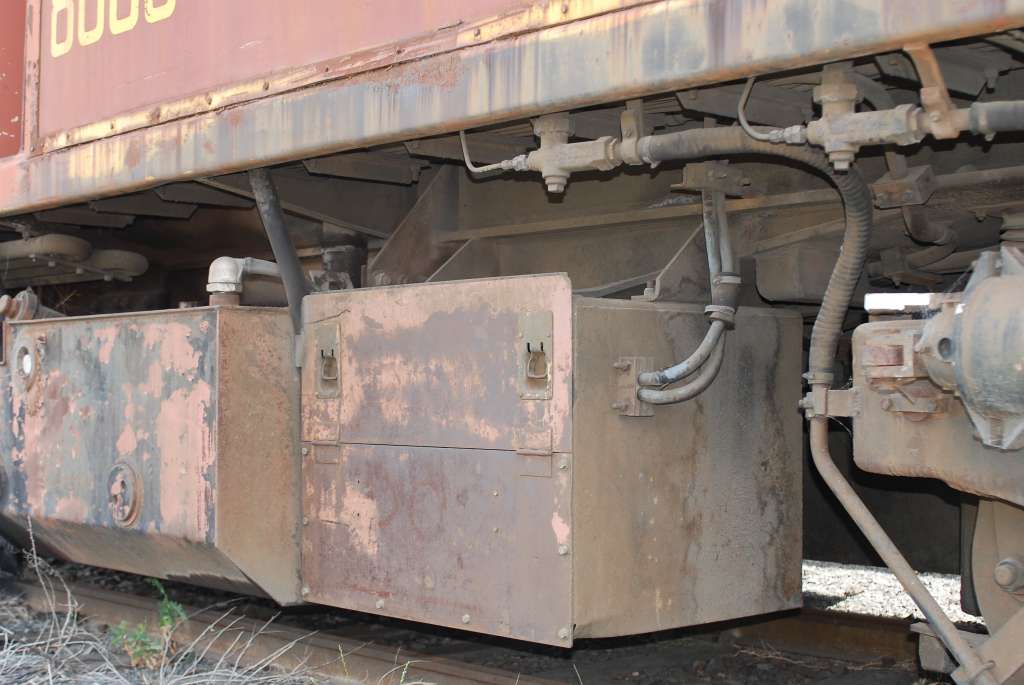
Also in this photo look at the space between the wheel journals and the bottom keeper plate under-neigh. On the model this looks excessive. I am sure that both of these would not be hard to fix?
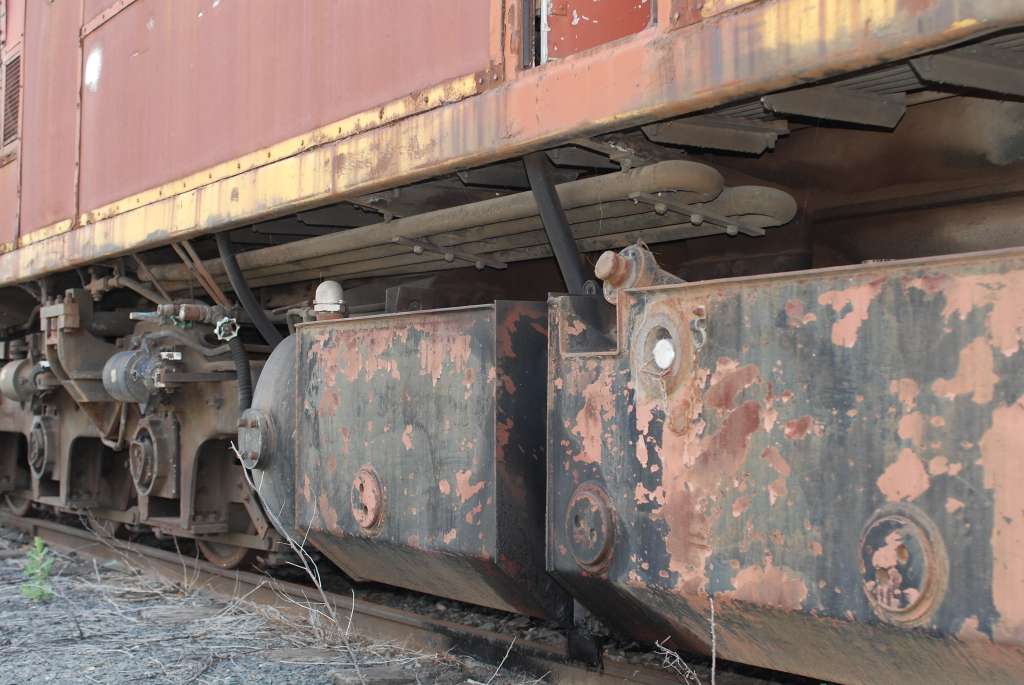
Now these are cosmetic considerations. The split in the Main Air Tanks. I am sure the factory would of had a reason to do them this way but I am going to do some filling and sanding on this one. Just under the fuel filler there is a separate little piece there that just doesn't look right so I am going to work on a fix there. These are just small little things that I want to fix to have as good a model as possible.

Now these are cosmetic considerations. The split in the Main Air Tanks. I am sure the factory would of had a reason to do them this way but I am going to do some filling and sanding on this one. Just under the fuel filler there is a separate little piece there that just doesn't look right so I am going to work on a fix there. These are just small little things that I want to fix to have as good a model as possible.
Here is a couple of shots as reference

The detail is all there. It is impressive no doubt. I am looking forward to the weathering process to enhance this even more.


So that is the Chassis basically covered.
The body has all the detail that is expected


It has the see through brass mesh where required, metal hand rails, mirrors all that one would expect. No issues there. The only thing that I could fault regard the body is the windscreens. There is an issue there.


They are a little off shape. They are OK with the width but the top of the windscreen sits too high.


If you study these examples you can see the shape is just not right. The windscreen rubber at the top so about the same height as the gutters at the side of the cab. On the model if you refer to this, it is well above this point (please see second photo). I don't know how to fix this one. It does distract from the model in my view. It is one of those things that you look and it doesn't look quite right, but at first you can't put a finger on it. I will figure it out some how. As far as I can tell all 80's windscreens were like this. I know that 8030 and 8049 have newer slightly different shaped windscreens fitted that sit higher after they entered private ownership.
Also there is a little cut out at the bottom of the head stock just about the coupler that I am going to enlarge a little for appearance as well
My plan is to have my 8010 look somewhere like in these two photos. To do this I will need to remove the Bicentennial boards off the sides. On the Austrain's model this was easy. Lets see how this one turns out.


Anyway that is all I can think about for now. It is a fine model. I don't want anyone to think that I have an agenda. I just want to talk about my modelling pursuits and this is what I am going to do to this model so when I have my layout running, the photo's will be exceptional. I have been working on an Auscision 442 as well. I will talk about that soon.

Cheers for now
Justin Moy
I am looking at my diesels in a whole different way now Justin. Curses. I still am quite happy with them from the factory. One other thing on the windscreen wipers, was the attachment point is inboard of the end of the pair of marker lamps on each side of the cab front, where the model has it between the 2 marker lamps. Great detail shots.
ReplyDeleteYou'll also notice that the axle end is directly under the door whereas model is not, so it's not entirely the step's fault.
ReplyDelete