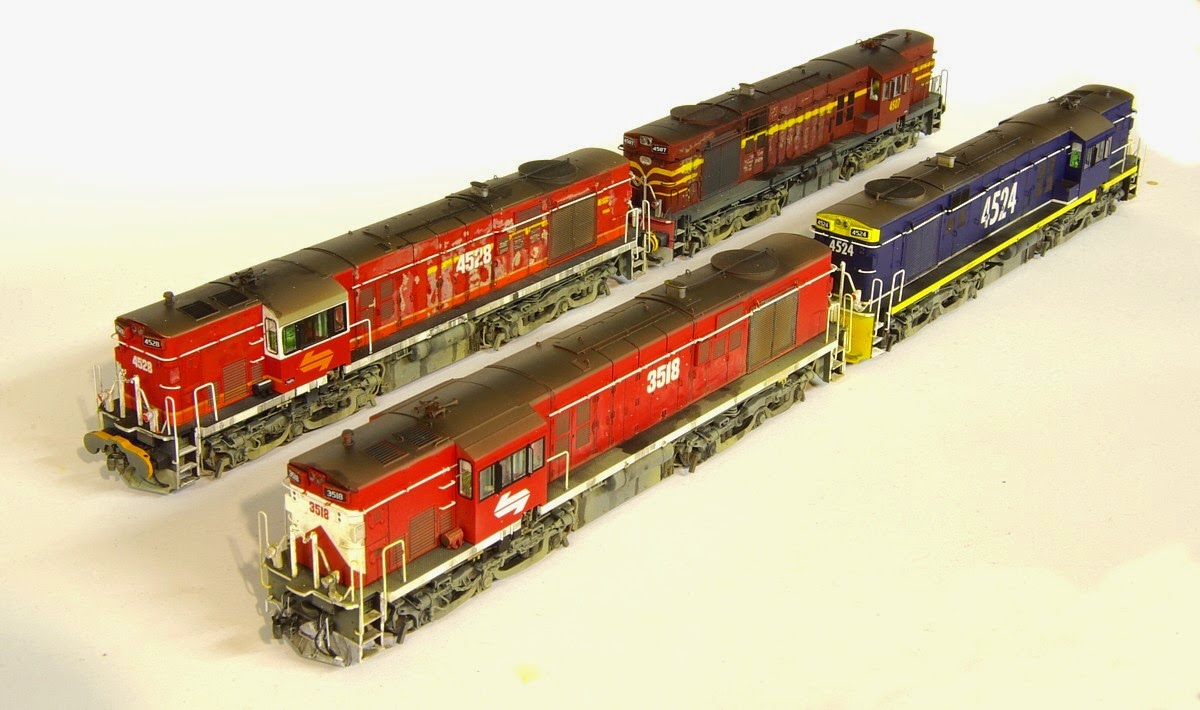
I would like to show you guy's the Auscision 45 class. This is not a review as such, just a bit of a look at the model and the prototype. There is a few little things that can be done to make them your own and a better representation of what was a hard working Locomotive. I have been given four un-powered pre-production samples to have a bit of a play with. My task is to weather these and photograph them. Firstly I would like to say they are pretty nice models. I have gone over them and compared them to photographs and they stack up pretty good. The Four that I have are 4507 in Tuscan (80's era), 4528 in Candy (80's era), 3518 (late 80's early 90's era) and 4524 in Freight Rail Blue (early 90's era). I have done some work to improve what is a good model and I will list the work as I go with this blog. I don't have any shots of my own of 4507 in Tuscan so I can't really show prototype photo's of that loco but my weathering goes along the same lines as the other three Loco's.
Here is an overall shot of the finished loco's. They make for a good representation of the Prototype as does all of Auscision's available models.
Firstly I will talk about some little modifications that I have made to these models to improve their appearance that are not within the scope of the Manufacturer.
One thing that I have noted is the model is reasonably easy to pull apart. The Foot Plate, Hood and Cab can all be separated. For me this makes it a lot easier to Weather with an Air Brush.
One of the limitations of Manufacture is that many of the Cab interior details are only the one colour. I guess they could of been painted in all the right colours but we could be paying more for the model. I have painted the Control and Brake Stands in a darker Green to represent these features. I haven't painted them as dark as I should, this is because when they are in the cab and the darker environment they will look about right for the viewer. I have also added to the light green around the cab interior and also painted the cab sealing.
A nice feature of the model is the Etch Grill over the main radiators.
I have studied a number of prototype photo's and come to the conclusion that this will be hard to weather and look right. My first thought was to remove the grill and weather and paint separately but I have decided to weather them on the model.
My decision was to mask up the outside parts of the grill where painted body work shows through and only spray the area that the main radiators show. It then creates a bit of an illusion of the radiators showing behind the grill. Painting it all separate didn't show up the detail well enough to justify pulling all the grills of in my view.
This is the basic look of doing it this way.
Now for a few detail photo's
There is a couple of air filter variations presented on the model. Both 4528 and 3518 were provided with this Louvered type Air Filters which represent the Prototype in the colour scheme provided. 4507 and 4524 have the original mesh type Air Filters.
The Main Radiator Fan showing some extra Plumbing that was a modification to 45's around the late 70's. The Fan is see through and there is an etch on top of the exhaust stack.
There is Brass Air Horns and a brass Toilet Vent Provided. There is a brass Etch provided to represent the Dynamic Brake Grids. It is good to note that Auscision has lifted it's game to provide Brass details such as this after noting some breakages with plastic horns on earlier models. They are also providing Brass Brake wheels on some newer rolling stock such as the WBAX Louver Van.
There is some nice detail around the fuel tank. My only gripe around the fuel tank is a couple of breather Pipers that are done in half relief. Again this maybe a manufacturing cost limitation. For a modeller like me, it isn't that hard to add this detail. I am not sure about the fuel tank. To me it sits a bit lower than it should. This is just by studying photographs. I could be wrong but I think there should be a little bit more air between the Rail and bottom of the fuel tank. There is some electrical switches on the bottom of the tank so it maybe a size limitation by the manufacturer.
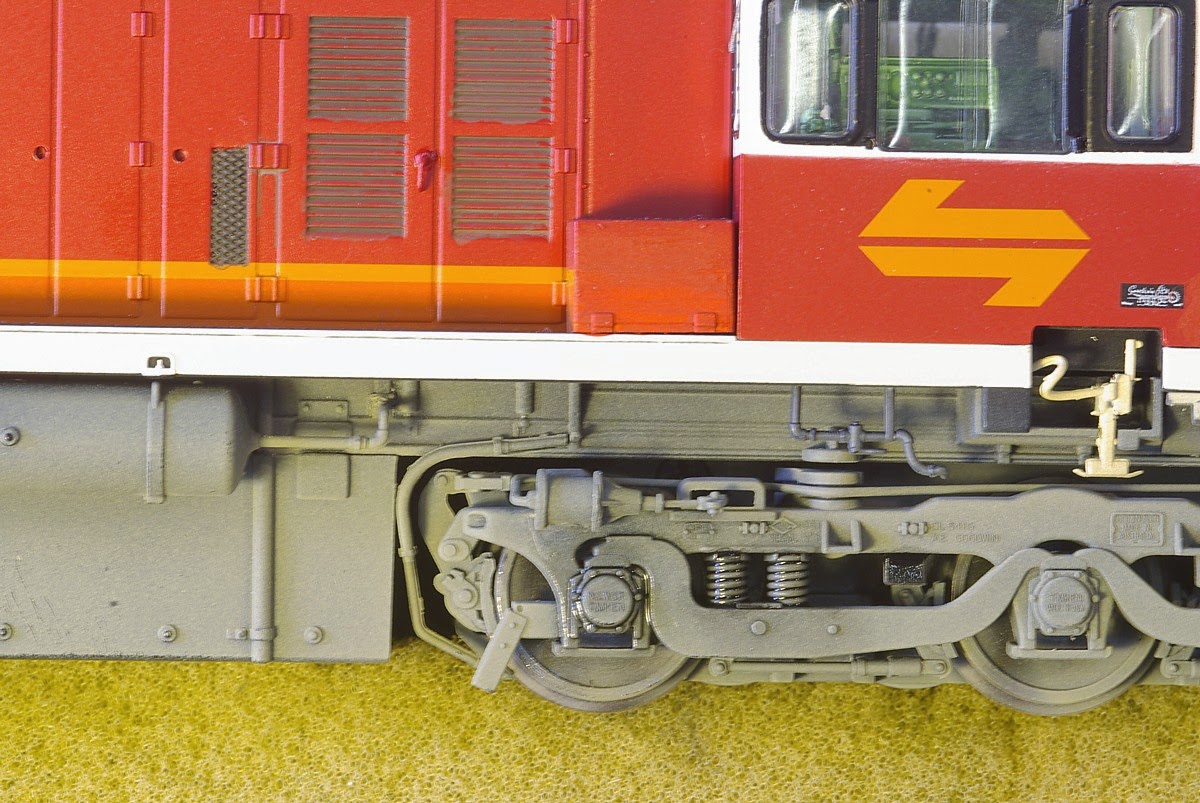
The Bogie and staff exchanger detail is all done nicely. One thing that has sold me with this model is the break shoes that line up with the wheel treads. The Tri-mount Bogies are well represented with the best looking representation of the Elephants Feat That I have seen to date on a model. To date this detail has been represented rather poorly on models and it is good to see this detail look as it should on the 45 class. I hope that it is done just as well on their future 48 class model.
Another shot of the Elephants Feet. I have also run a wash inside the Springs Shadow detail and also a wash around one of the wheel journals to add so depth to the model.
Some of the Brake detail
There is some nice detail in the bogie casting.
4507 (80's era Tuscan)
Out of the Box.
After a good weathering. I haven't had to carry out any correction to paintwork of the Tuscan Model. Just Weathered the loco based on photo's in the Train Hobby Publications 45 class Locomotive Profile Book. Books like these are a good source of correct coloured Photographs for weather purpose. I left the crew in this model as it was still able to lead in this format.
A few more shots to show the weathering and detail
4524 (early 90's Freight Rail Blue)
Out of the Box
The Prototype sitting at Broadmeadow in 1993
Comparing this Photo to the model, First ignore the difference in the Colour. It is hard to compare the paint work under the different lighting. The colour of a Loco can look very different under different lighting at different times of day and weather settings. Other that repainting inside the cab, I have painted the couplers and air hoses to represent the prototype. I have added KD- number 58's to the model as they take well be being painted where I have found that many of the RTR provided Scale couplers do not. The other paint detail added was painting all the hand rail eyelets Blue to match the Prototype. This would be another Manufacturing Cost limitation I guess. It is not hard to use a fine brush and paint this detail and it does make a real difference to the appearance of the model. I removed the crew from this loco as it was really able to lead on the Mainline in this format.
I have also added some sun visors to the windscreens as a nice detail.
I must say Freight Rail Blue is hard to weather and look right.
looking at the photo's now. I should add a little bit of rust around the couplers
3518 (late 80's early 90's)
Out of the Box
3518/3532 at Taree in 1991 with 4503 in the Back ground.
Comparing the prototype to the model, there was a few paint modification that I carried out to the model. Firstly the White in the Pilot was repainted silver. I am not sure if 3518 originally had white on the pilot when it was first paint so I am not sure if this is a mistake on this pre-production model. It was definitely silver later on so I have corrected this detail. I have also painted all the eyelets red as per the prototype. One this on the fronts of the eyelet are paint white like the handrails. Another Modification I carried out was removing the Control Stand and Brake Stand from the Observers side of the Loco as this was a modification carried out to all 35 class Locomotives. I have left the Crew in this one as 35's were able to lead in this era. I have also added sun visors on both the Drivers and Observers side of the cab.
Painting the Eyelets
I also painted the independent Air Hoses White.
4528 (Candy Late 80's/ Early 90's)
Out of the Box
A few Prototype Shots of 4528 provided by Dave Porter.
There was a few paint modification carried out to this model. For some reason I can't find photo's of Candy Strip on the cab doors so I have painted this detail red on the cab doors of the model. The Candy Strips still seem to rap around the cab under the drivers windscreens but not the doors. Also the Box behind the Observers Windscreen had the Candy Strips removed. I feel that the L7 is a bit too big on the model but I have left that detail for now. On 4528 the eyelets are completely painted red so I have carried out the work. Some of the photo's of this loco show quite a bit of the original paint work showing, so I have tried to represent this in the weathering. The Crews have been removed and sun visors added to both the drivers windscreens. Auscision have provided this Loco with Buffers. It did have buffers on when first painted Candy but in my era they were gone. If I get to keep this loco I will address that at a later date.
Anyway this is a bit of a look at the Auscision 45 which should be available soon. It is a nice model and has some nice detail features. I think most if not all buyers will be pleased with this model. I can't comment on the operational ability of the model as these are all un-powered pre-production samples but going off previous Auscision model's, I don't thing there should be many issues.
Happy Modelling
Justin Moy


Absolutely fantastic work Justin. Definitely looking forward to getting mine. I will have some renumbering to do, but I'm hoping it won't be too difficult.
ReplyDeleteCheers,
Ian
Brilliant work Justin. Can you describe your technique/method for weathering bogies? What colours or combinations of colours to you use to create these lifelike effects? Do you need to remove the wheels before painting them to get an even coverage? Many thanks, keep up the great work. Paul.
ReplyDeleteHi Paul. Just a simple silly question. Why can you purchase Ausicion models with or without buffers like on the 46 class??. Can you replace the non buffered one and attach buffers??
ReplyDeleteVery nice modeling Justin. The weathering certainly highlights the details. Thanks.
ReplyDeleteJustin, I am trying acquire one of the 45 Class Alco Diesel loco. Do you have any model available for sale?
ReplyDelete